For the assignment 2, this are the steps on how I did it:
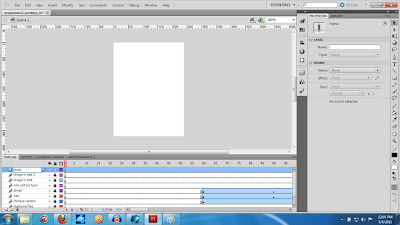
1) Open up Adobe Flash Professional CS5 and select 'ActionScript 3.0'. An empty stage will appear. Save it as assignment2_working.fla just in case for backup. Select View>Rulers.
2) Press CTRL+J and the document settings dialog will appear. Set the dimensions: 240px(width) x 340px(height). Set the frame rate: 12.00 and click OK.
3) Select View>Magnification>Fit in Window so that the stage can be seen better.
4) In the Layer 1, click on the frame 1 and hit F5 until the frame for layer 1 reaches at frame 240.
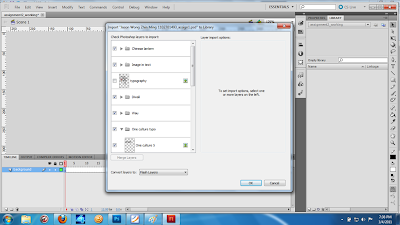
5) Select File>Import>Import to Library and choose the poster that was done in a psd file. Click OK. This will add objects from the psd file into the Adobe Flash' library section. Rename the layer 1 to 'background'.
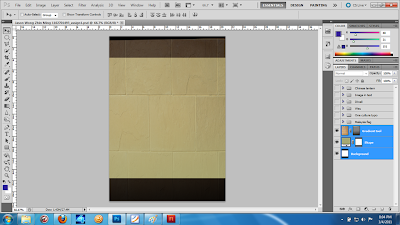
6) Here's where I open up my previously saved poster for the assignment 1. In the psd file, uncheck all layer's view except for layer 'Gradient tool', 'Shape' and 'Background'. Select those three layers mentioned and select the images and dragged them into 'background' layer in the Adobe Flash software. Set the dimensions for the 'background' layer where W:240px and H:240px.
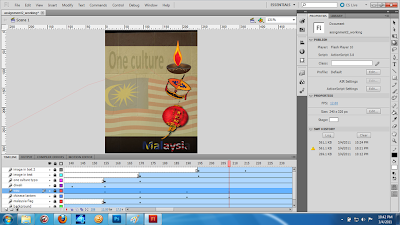
7) Right-click on the background layer and select create motion tween. Then, select 3D Rotaton Tool on the panels on the right side of the software and click on the stage. At frame 1, in the properties section for background layer, set the COLOR EFFECT>Alpha: 0%. At frame 60, in the properties section for background layer, set the COLOR EFFECT>Alpha: 100%. When it is done, lock the layer.
8) Select the layer 'background' and create new layer. Rename the new layer as 'chinese lantern'. Then, on the frame 60 for the 'chinese lantern', right-click the mouse and select 'insert keyframe'. Drag the chinese latern from the library section onto the stage.
9) At frame 60, select the lantern image on the stage using the selection tool, and push the image upwards to out of the poster from its original position by pressing the 'arrow' key(upwards). Then, duplicate the keyframe 60 by using ALT+left-click and have it move to frame 120. Return the chinese latern image to its original position by pressing arrow(downward) key. When it is done, lock the layer.
10) At frame 60 of the 'chinese lantern', create a new layer, rename that new layer as 'wau'. Create motion tween for it.Then, drag in the image of 'wau' from the library onto the stage. Using selection tool, have the wau move from frame 60 to 90, 110, 129 while making its size decreasing by using Free Transform Tool. When it is done, lock the layer.
11) At frame 60 of the 'wau', create a new layer, rename that new layer as 'diwali'. Insert keyframe for it at frame 60. Create motion tween by right-click. Then, drag in the image of 'diwali' from the library onto the stage. Adjust the size using the Free Transformation Tool. At frame 60, of the 'diwali' layer, use 3D Rotation Tool to change the the color effect>alpha: 0%. Then, at frame 90, color effect>alpha: 100%. Have the diwali image move at different positions at different keyframes until it reaches on top of the wau image.
12) On the layer 'diwali', create a new layer, rename the new layer as 'one culture typo'. Then, right-click at frame 155 of the 'one culture typo' and insert keyframe. Drag in the 'one culture typo' image onto the stage from the library. Adjust the size(decreasing) by using the 'Free Transformation Tool'. Have the image above the poster by pushing it upwards by pressing the arrow(upwards) key.
13) At frame 170, push the image down by pressing arrow(downwards) key until it reaches next to the diwali image.
14) At the 'one culture typo' layer, create a new layer, rename the new layer as 'image in text'. Insert a keyframe at frame 170 . When it is done, lock the layer.
15) Drag in the the image 'malaysia' from the folder name 'image in text' in the library onto the stage. Place the image on the bottom left of the poster at frame 170.
16) Select on frame 195, push the the image 'malaysia' on the stage from left to right by pressing arrow(right) key. When it is done, lock the layer.
17) On the layer 'image in text', create a new layer, rename the new layer as 'image in text 2' and insert keyframe at frame 195. Drag in the image 'Burn tool copy' from the folder 'image in text' in the library onto the stage. Place it at the exact position of the image 'malaysia' adjust the size of it using Free Transform Tool. Then, right-click the layer to create motion tween.
18) Use the 3D Rotation Tool on the frame 195, where color effect>alpha: 0% in the properties section. Next, select frame 215 and increase the color effect - color effect>alpha: 100%. When it is done, lock the layer.
19) Select the 'background' layer, create a new layer, and rename the new layer as 'malaysia flag'. Insert keyframe at frame 155. Next, drag in the image 'Burn tool' from the folder 'malaysia flag' in the library onto the stage. Set the position and size - X: 0.05, Y: 117.65, H: 161.40, W: 239.40
20) Use the 3D Rotation Tool to change the color effect where color effect>alpha: 0% at frame 155. Then, at frame 170, color effect>alpha: 100%. When it is done, lock the layer.
21) Adjust the size and position of the image 'chinese lantern' at starting at frame 208 to 239 by using the Free Transform Tool and Selection Tool, same goes for the image 'wau' and 'diwali' but in order to do so, the layers must be unlocked. When it is done, lock the layers.
22) At the layer 'image in text 2', create a new layer, and rename the new layer as 'music'. Then, go to File>Import>Import to Library. Import 'edited.wav' into the library.
23) Select the layer 'music', and drag the 'edited.wav' from the library onto the stage. Then, press enter to play the flash. Change the FPS in the properties where FPS: 13.00. When it is done, lock the 'music' layer.
24) Go to File>Publish Settings. Pictures below is shows how I set the settings.
Done!


 .
.


No comments:
Post a Comment